 Bass Madness
28 March 2018
Fingerboard
While the neck wood was drying out, I started work on the fingerboard. This was supplied ready slotted. I know this is a cheat but the cost of having the thing slotted was very reasonable, it would have took me an age to get things right without the proper jigs and I probably would have made a hash of it.
The rosewood neck was supplied in AA grade wood: a very nice piece of wood that smelled really good. My wife is an aromatherapist and often uses Rosewood oil in her treatments.
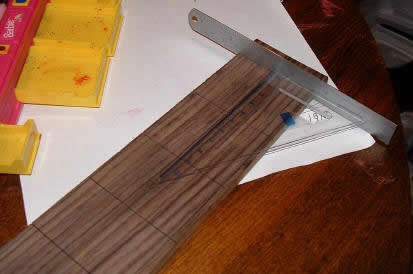
The first job on the fingerboard was to mark it out for the mother of pearl dots. This was not as easy as it might sound. The wood was accurately slotted but rough cut to size. I had some difficulty finding the natural centre of the board. I did this very carefully, if crudely, using a small steel ruler and one of my daughter's school set-squares. This marking was critical to the accuracy of the board and would determine how the board would be trimmed before gluing to the neck.
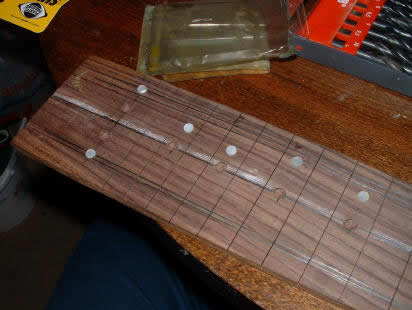
Having accurately marked the fingerboard, the next job was to drill the recesses for the 6mm dots. This did not go well for the first dots. For the first two dots, after centre punching, I drilled a pilot hole, using a hand drill, to centre the dots before enlarging the hole in small increments, to ensure that the drill remained central. This did not work well and resulted in chipping the surface of the wood. All was not lost, because the board had ample thickness. I just sunk the dots into the surface an extra 0.25mm. Having learned a lesson from this, I followed the 1.5mm pilot drill immediately with the 6mm drill. This worked perfectly. The 6mm dots were fixed in place using an epoxy adhesive.
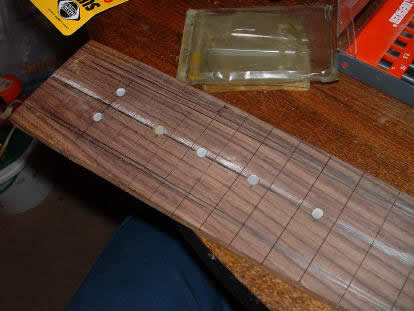
The fingerboard radius was made with an appropriately shaped sanding block, from David Dyke Luthiers Supplies, and a course grade abrasive paper. This took lots of elbow grease but did the job eventually. The sides were trimmed to size and 1.5mm side dots were added.
